

Battenberg cake
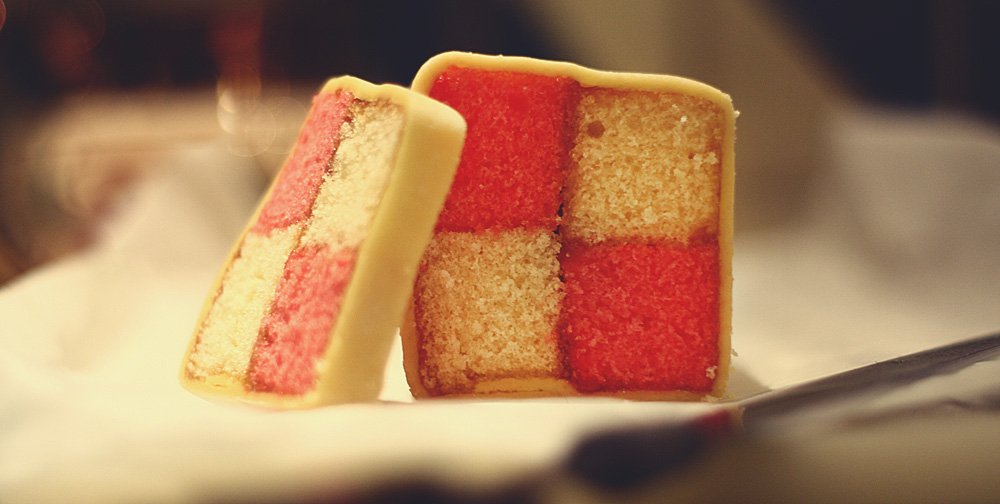
Battenberg cake is a delightful British classic which is a scrumptious sponge cake that is divided into four colorful sections, usually pink and yellow, all wrapped in a layer of marzipan.
Click below the individual ingredient link to shop on Amazon.
As an Amazon Associate, we may earn commissions from qualifying purchases.
As an Amazon Associate, we may earn commissions from qualifying purchases.
Ingredients
- 1 cup unsalted butter softened
- 1 cup granulated sugar
- 2 cups self-raising flour
- 1 teaspoon baking powder
- 4 medium eggs
- 1 teaspoon vanilla extract
- few drops pink food coloring
- few drops yellow food coloring
- 1 cup apricot jam
- 1 pound marzipan
Instructions
- Preheat your oven to 180°C (350°F) and line a square baking tin with parchment paper.
- In a large mixing bowl, cream together the softened butter and granulated sugar until light and fluffy.
- Gradually add the eggs, one at a time, beating well after each addition. Stir in the vanilla extract.
- Sift the self-raising flour and baking powder into the bowl and gently fold it into the mixture until well combined.
- Divide the batter equally into two separate bowls. In one bowl, add a few drops of pink food coloring and mix well until you achieve the desired color. In the other bowl, add a few drops of yellow food coloring and mix well.
- Spoon the pink batter into one half of the prepared baking tin, and the yellow batter into the other half.
- Bake in the preheated oven for approximately 25-30 minutes or until a skewer inserted into the center comes out clean.
- Once baked, remove the cake from the tin and let it cool completely on a wire rack.
- Trim the edges of the cakes to make them square and cut each cake in half lengthwise. You should have four equal-sized rectangular pieces.
- Warm the apricot jam in a small saucepan until it becomes spreadable. Brush the top of each rectangular cake slice with the jam and press them together to form a checkered pattern (two pink and two yellow slices).
- Roll out the marzipan on a surface lightly dusted with icing sugar into a large rectangle, approximately 30cm x 20cm.
- Spread a thin layer of apricot jam over one side of the marzipan, then place the cake stack on top and wrap the marzipan around it, sealing the edges.
- Trim off any excess marzipan and gently flip the cake over, so the seam is at the bottom.
- Allow the cake to set for a while, then serve and enjoy!
Disclaimer
Some parts or all of recipe maybe AI-generated. Recipe pictures are examples of recipe and represent no affiliation with photographer.
Nutrition
Calories: 788kcal (39%)Carbohydrates: 96g (32%)Protein: 13g (26%)Fat: 41g (63%)Saturated Fat: 17g (106%)Polyunsaturated Fat: 4gMonounsaturated Fat: 17gTrans Fat: 1gCholesterol: 143mg (48%)Sodium: 119mg (5%)Potassium: 246mg (7%)Fiber: 3g (13%)Sugar: 61g (68%)Vitamin A: 896IU (18%)Vitamin C: 3mg (4%)Calcium: 93mg (9%)Iron: 2mg (11%)
Disclaimer
Nutritional information for this recipe is an approximation and is not to be construed as medical advice.
 Promotions Kitchenware
Map Recipe
Promotions Kitchenware
Map RecipeDiscover more from MenuCulture
Subscribe to get the latest posts sent to your email.